Category Archives: Electronics

ATH AD-900 Color Mod

I’ve decided to spiff my Audio Technica AD900s up with some new color. Unfortunately there are few sources about taking these headphones apart, and what their internal layout is. So I’m giving a walkthrough on disassembling the AD900s, which turned out to be very easy, and how to modify the color of the metal mesh that hopefully looks kinda cool!

When pulling the pads off the ear pieces it seems like they will never come back on, but this is not the case.

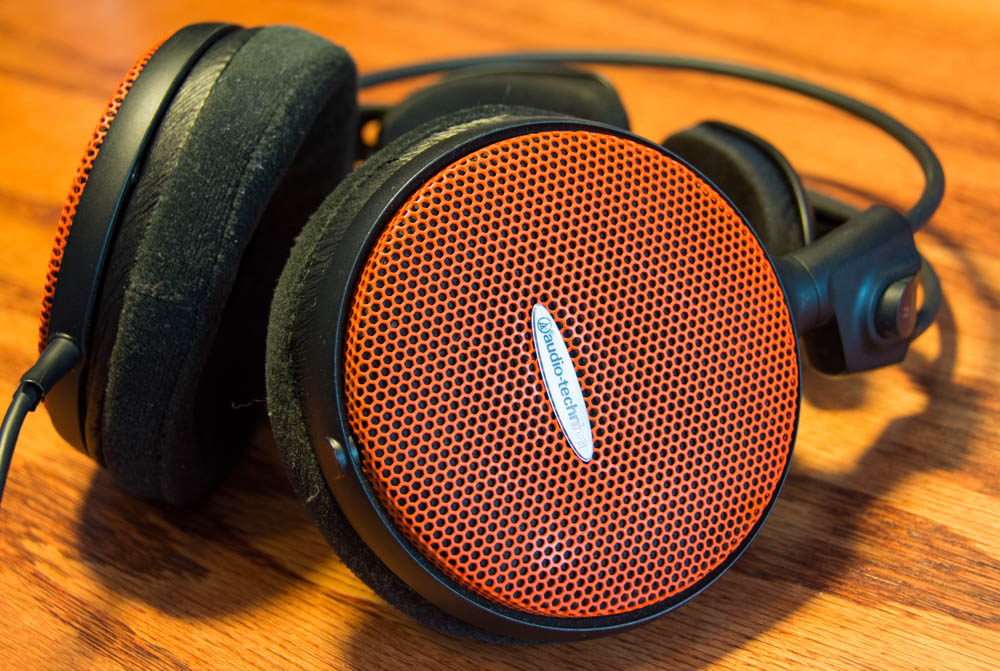
The speaker mount is attached by four finely threaded phillips head screws to the body of the headphones, and requires a little force to be pried free. Once you’ve got it off, it remains wired to the rest of the body, but the metal mesh is easily removed. The foam backing (taking this off can alter the sound) is affixed with some adhesive behind the “audio-technica” sticker, but is easy to remove.

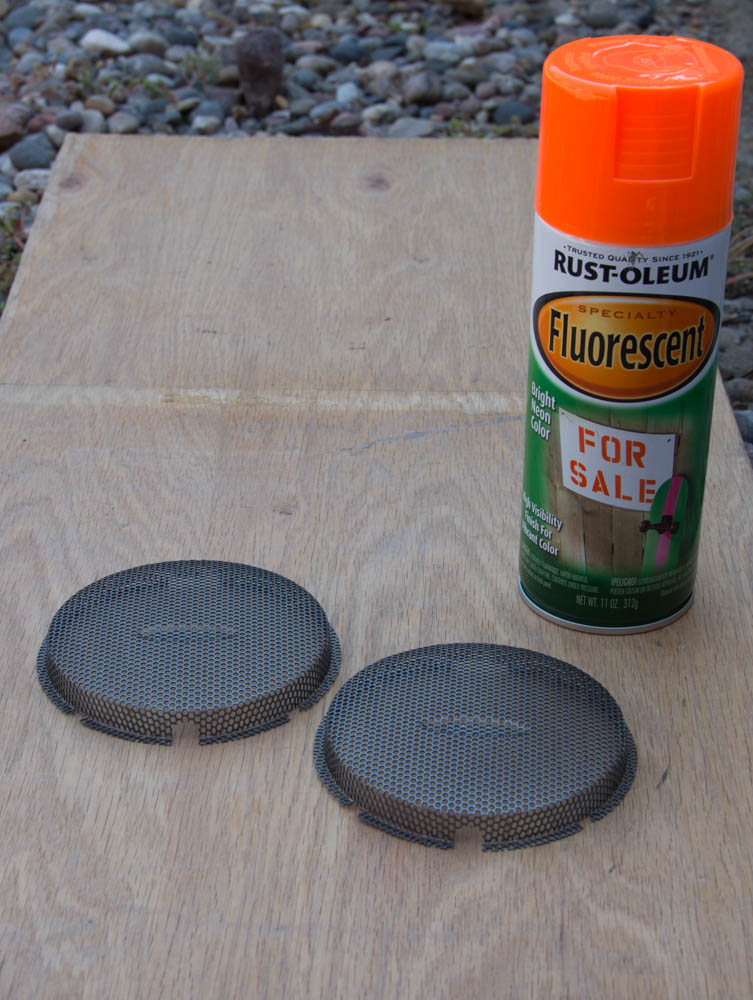
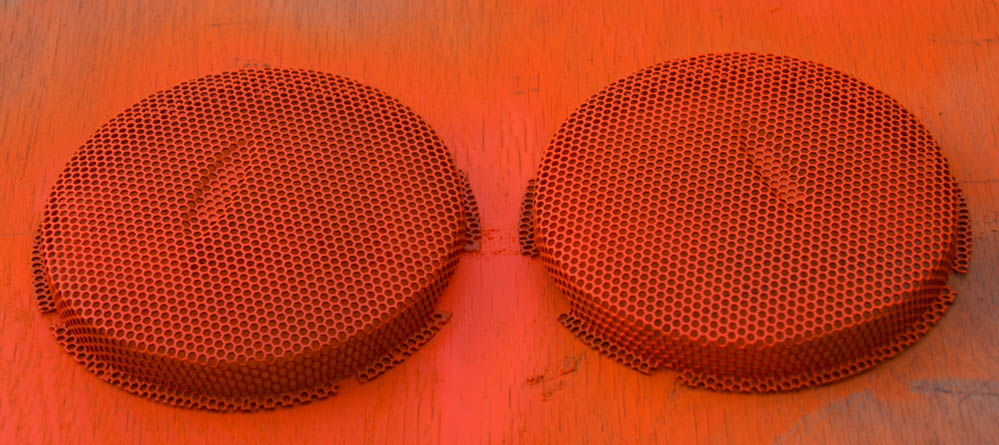
Overall it is very easy to take apart and put back together! To paint the mesh, I also removed the “audio-technica” logo which seems to be some sort of metal stuck to the mesh with a glue strip, which you can get off with a small screwdriver.

CMoy Amp

My good friend (who is an electrical engineer) and I decided to make a pair of Cmoy amps for headphones. I have a pair of Audio Technica ATH-900s which I feel are sometimes not sufficiently served by most devices. We followed the plans by tangentsoft for the most part. The site is amazing and all of the information is well written and curated.

Unfortunately the design provided there doesn’t cover the power supply, it assumes you use 9V batteries. My brief readings indicate that these don’t last particularly long, and I was most interested in using my amp with a computer : no need for portability. We created our own power supply by buying an unregulated 18V wall-wart (not switching). Our circuit to reduce the noise and regulate the input was provided by the voltage regulator datasheet, however we found it necessary to add a large cap (1000\mu
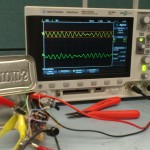
F) to the input to reduce the AC wave.

Overall, the amp does what I hoped it to do; it gives sufficient volume on almost any device. A lot of audiophile people comment on the change in sound provided, but I don’t really feel comfortable doing so. It sounds fine, maybe the bass is a little punchier.

Cleaning Razer DeathAdd3r 3.5G

This is my second Razer mouse, and this one has lasted much better than the last (which was a diamondback). In the original, I had replaced all of the Green LEDs with red ones to match my case at the time, because I was young and into such things. The Deathadd3r has a similar layout on the inside. This mouse is already a few years old, and lately the wheel has been acting up. Sometimes it will scroll in the wrong direction, and performing a middle click is very difficult. I figured cleaning it might help remedy this situation.   To take it apart, there are three screws on the bottom, two under the top two teflon pads, which can be put back pretty safely.

DSC_0853DSC_0858

There are two boards inside, each is attached to the bottom/top half by means of two screws and some plastic locks which require you to tilt the boards to remove them. The bottom board also has a little plastic tab on the side holding it in place.DSC_0857

DSC_0852

Additonally there is an led stuck in the top, which makes the logo glow that you probably want to take out. Unlike the diamondback, you cannot separate the two boards, however I didn’t feel there was a good reason to clean the motherboard, as all of the switches seemed to be functioning fine.The top shell can be separated into two layers by pushing out a few plastic clear tabs on the inside of it. You need to slide it upwards to disengage the left/right mouse click assembly.

DSC_0854

My wheel was coated in hair and a thick layer of oil… (sebum?) as well as plenty of grime everywhere. I washed all the parts in a warm/water detergent solution with a toolbrush, except the reflector for the tracker (best not to touch that).

DSC_0855DSC_0860

In the end it is cleaner and actually works better. The middle mouse button still isn’t 100%, but it works much better than before, and the scrolling seems to have improved, although I suspect there is some slippage in the switch itself.

Growing a RAID!

New Seagate-green-2tb platter is here! Unfortunately it will have to pretend to be only 1gb large for now (I didn’t want to go through the hassle of partitioning it and using only one partition in the RAID, which I might later enlarge to use 2TB per disk)

This coincided oddly with a discussion of how RAID works in my Operating Systems lecture… anyway ETA till it has a copy of the rest of the data is 1530 minutes.

Here is the resource I followed to set it up and grow it
https://raid.wiki.kernel.org/index.php/Growing